How to order a refill
Cartridges are refilled at bNovate. You can request a refill for one or several cartridges at once from this portal. This page walks you through the process.
- Your account is configured by our Customer Service team. Please contact them at sales@bnovate.com if any changes are required.
- If your account is configured to organize returns, you can obtain a return label and schedule the pickup directly from the portal. Pickup and delivery must be made to the same address.
1Select your cartridges
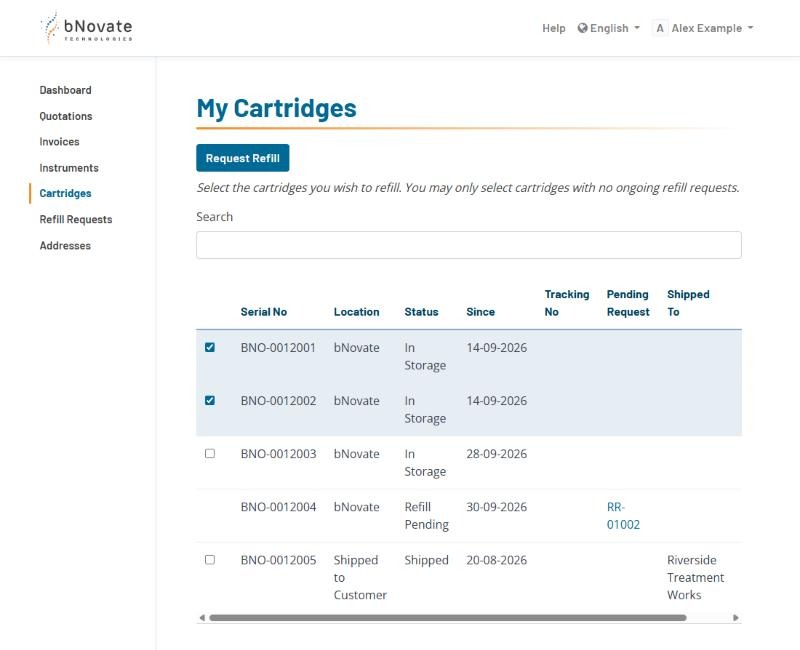
Open Cartridges in the menu. The list shows your cartridges and where they are. Tick the cartridges you want to have refilled, then click Request Refill.
Depending on your account, you can only select cartridges that are currently at bNovate. Cartridges that already have a refill request in progress cannot be selected again.
2Choose the variant
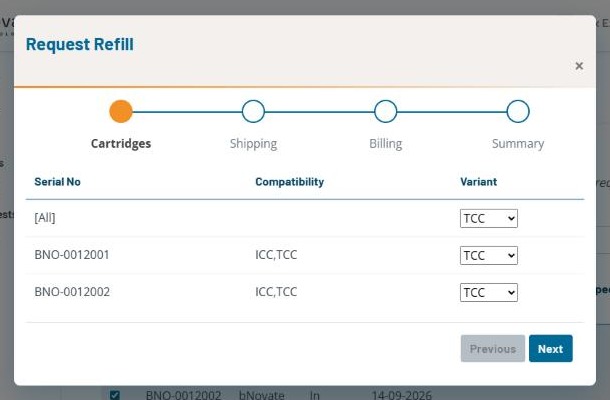
For each cartridge, choose the variant it should be refilled with. Use the [All] row to apply the same variant to all cartridges, then click Next.
3Pick the addresses
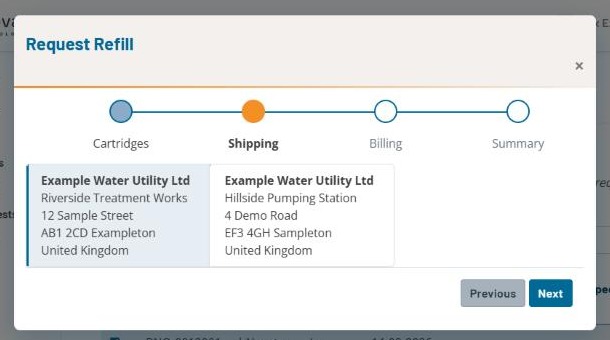
Select the shipping address the refilled cartridges should be delivered to and click Next. Then select the billing address.
If your account is configured for a central billing address, you cannot change the billing address.
Addresses can be managed under Addresses in the menu.
4Review and confirm
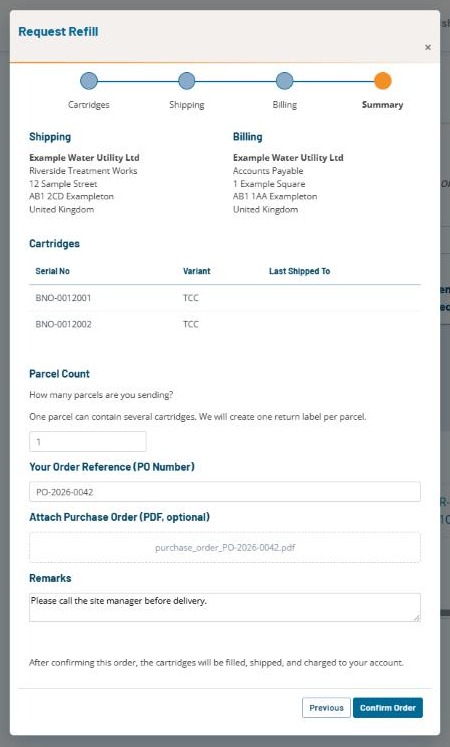
Check the summary. You can add your own order reference (PO number), attach your purchase order as a PDF, and leave remarks for bNovate.
If your account is set up to organize returns, you are also asked how many parcels you will send back.
Click Confirm Order to send the request.
5Follow your request
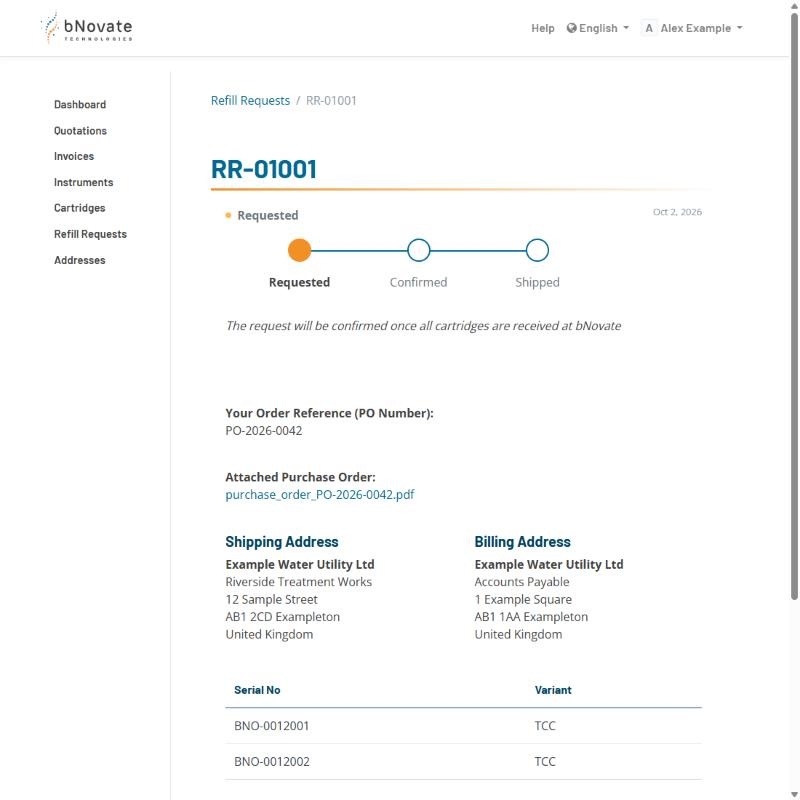
Your request now appears under Refill Requests. Its status changes from Requested to Confirmed once bNovate has processed it, and to Shipped when your cartridges are on their way back to you.
Returning your cartridges
If your account is set up to organize returns, bNovate manually verifies each refill request and then generates a return label. You are notified by email as soon as the label is ready.
6Open the request
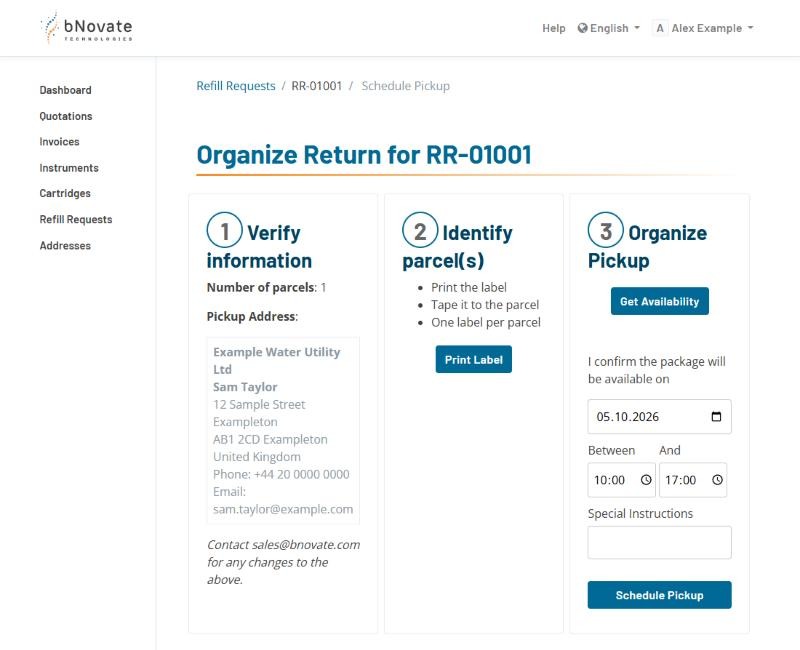
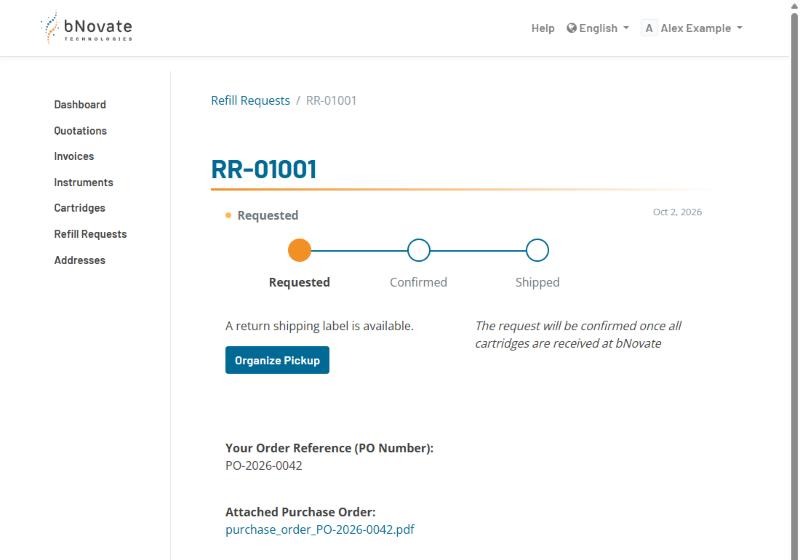
Open your request from the notification email or from Refill Requests. Once the return label is ready, click Organize Pickup.
7Organize the pickup
- Verify information: check the number of parcels and the pickup address.
- Identify parcel(s): print the label and tape it to the parcel. Use one label per parcel.
- Organize Pickup: click Get Availability, choose a date and a time window of at least two hours, add special instructions if needed, then click Schedule Pickup.